Self-Hosted Server Guide
Run your own GameVox server on your hardware. Full control over voice, chat, files, and data — with automatic updates and cloud account sync.
Contents
- Overview
- System Requirements
- Getting Started
- Setup on Windows
- Setup on Linux
- Setup with Docker
- Firewall & Port Forwarding
- Environment Variables
- How It Works
- Telemetry & Monitoring
- Database Architecture
- Automatic Updates
- Backups & Restore
- File Storage & Large File Backups
- Data & File Locations
- Troubleshooting
- LAN & Event Use
Overview
A self-hosted GameVox server runs entirely on your own machine — your voice, messages, files, emojis, and soundboard clips are stored locally on your hardware. The server connects to GameVox cloud for account authentication and auto-updates, but all your community data stays on your machine.
Voice & Video
Built-in WebRTC SFU for crystal clear voice and video, hosted on your own network.
Chat & Files
Full text chat, file sharing, emojis, soundboard, polls, events, and announcements.
Automatic Updates
The server binary updates itself when a new version is available. Zero manual intervention.
Cloud Account Sync
Members sign in with their GameVox accounts. Usernames, avatars, and badges sync from the cloud.
Automatic Backups
Databases are backed up every 3 hours with tiered retention going back 12 months.
One-Click Restore
Restore to any backup point from the server settings GUI. A pre-restore backup is created automatically.
System Requirements
- OS: Windows 10/11 (64-bit) or Linux (64-bit, glibc-based)
- RAM: 512 MB minimum (1 GB+ recommended for larger communities)
- Storage: 100 MB for the server binary + space for your community data
- Network: Stable internet connection with the ability to forward two ports
- CPU: Any modern x86-64 or ARM64 processor. Voice/video encoding is handled by clients, not the server.
The server is a single, self-contained binary with no external dependencies. No database server and no runtime to install. A Docker image is also available.
Getting Started
-
Create a new server in the desktop GameVox app. Self-hosted is free for life before July 1st. After that, $2/mo or $15/yr is required.

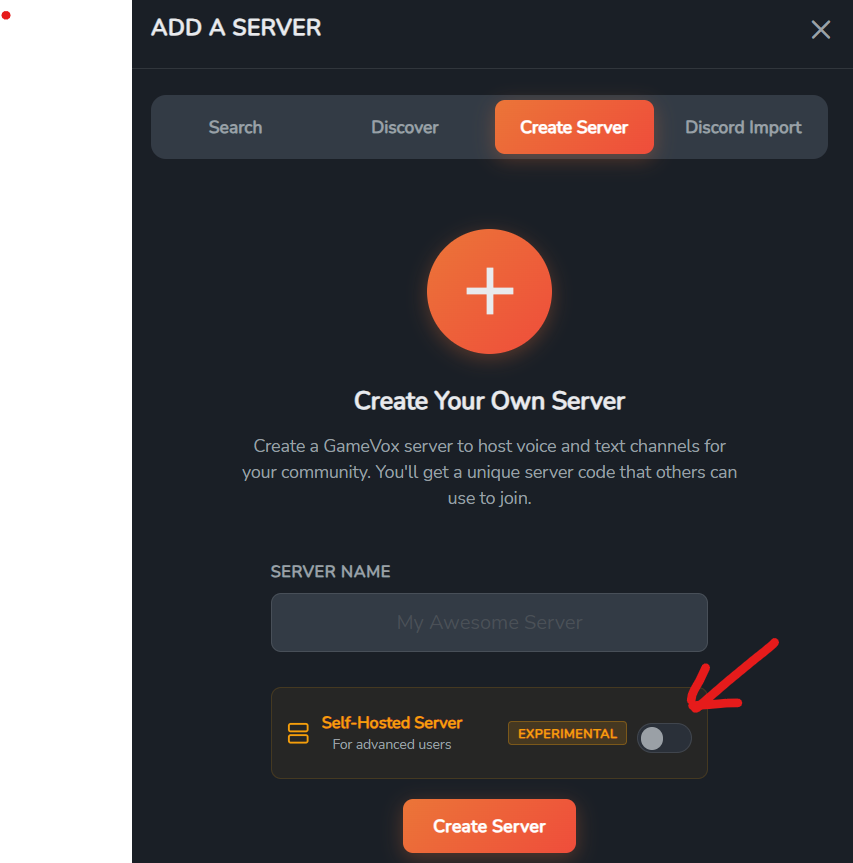
- Download your server binary. After activation, you'll receive a personalized server binary with your community's configuration embedded inside.
- Place it anywhere on your machine and run it. The server creates a
data/folder next to the binary for all databases and files. - Open the required ports on your firewall and/or router (see Firewall & Port Forwarding).
- Done. Your server will appear in the GameVox app. Members can join and start chatting.
Setup on Windows
1. Choose a location
Create a folder for your server, for example C:\GameVox-Server\. Place the downloaded .exe binary inside it.
2. Run the server
Double-click the binary, or open a terminal and run:
On first launch, you'll see the server create its data directory and connect to the GameVox cloud. The console will display the required ports:
3. Allow through Windows Firewall
Windows will likely show a firewall prompt on first run. Click "Allow access" for both private and public networks. If you missed the prompt, you can add rules manually:
4. Install as a Windows service (optional)
To keep the server running in the background and auto-start on boot, open an Administrator terminal and run:
The installer will prompt you to configure your server:
Press Enter to accept each default, or type a custom value. The installer then shows a summary of what it will do and asks for confirmation before proceeding.
On first run, the server will also offer to install as a service automatically — no need to pass --install manually.
Setup on Linux
1. Download and make executable
2. Install as a systemd service (recommended)
Run the installer to create a system user, copy the binary to /opt/gamevox/, and set up a systemd service:
The installer will prompt you to configure your server:
Press Enter to accept each default, or type a custom value (e.g. a mounted drive for data). The installer then shows a summary and asks for confirmation before proceeding.
Once installed, manage the service with:
On first run, the server will also offer to install as a service automatically — no need to pass --install manually.
3. Open firewall ports
Setup with Docker
Prefer containers? The self-hosted server runs great in Docker with ~45 MB RAM usage at idle.
1. Download the Docker zip
From your server's download page in the GameVox app, select the Docker option. This downloads a gamevox-docker.zip file containing everything you need:
2. Extract and build
Extract the zip, then open a terminal in the gamevox-docker/ folder and run:
3. Run the container
On Windows (PowerShell), replace $(pwd) with ${PWD} or the full path to your data directory.
4. Verify it's running
You should see the server connecting to GameVox cloud. Check the health endpoint:
Sample Dockerfile
If you'd like to build your own image, here's a minimal Dockerfile:
/app/data volume. Mount this to a host directory to persist data across container restarts and updates.
Updating
Auto-updates work the same as on bare metal — the server replaces its own binary and restarts automatically. If you prefer manual updates, you can also download the latest Linux binary, rebuild the image, and restart the container. Your data is preserved in the volume mount.
Docker Compose
Create a docker-compose.yml file in your gamevox-docker/ folder alongside the Dockerfile:
Using Docker Compose
Firewall & Port Forwarding
Your server needs two ports accessible from the internet so GameVox clients can connect:
| Port | Protocol | Purpose |
|---|---|---|
8088 |
TCP | WebSocket connections (chat, signaling) and HTTP (file downloads) |
7070 |
UDP | WebRTC media (voice and video streams) |
Both ports can be customized with environment variables: TCP_PORT for TCP and UDP_PORT for UDP. See Environment Variables for details.
To check if your ports are reachable, start the server and ask a friend outside your network to connect — or use an online port checker tool.
Environment Variables
The self-hosted server can be configured entirely through environment variables. Set these before starting the server to customize ports, storage locations, and more. All are optional — sensible defaults are used when not set.
| Variable | Default | Description |
|---|---|---|
TCP_PORT |
8088 |
Port for HTTP and WebSocket connections from clients (chat, signaling, file downloads). Change this if port 8088 is already in use by another application. |
UDP_PORT |
7070 |
Port for WebRTC media traffic (voice and video streams over UDP). Change this if port 7070 conflicts with another service. |
DATA_DIR |
./data |
Root directory for all server data: databases, logs, emojis, soundboard clips. Defaults to a data/ folder next to the server binary. Useful for Docker or when you want to store data on a separate drive. |
FILES_DIR |
{DATA_DIR}/files |
Directory for uploaded file attachments (images, videos, documents shared in channels and file shares). Set this to redirect file storage to a larger drive without moving the entire data directory. |
BACKUPS_DIR |
{DATA_DIR}/backups |
Directory for automatic and manual backups (database snapshots and file archives). Set this to store backups on a separate drive or network mount for redundancy. |
Examples
Windows (start-gamevox.bat)
Linux (start-gamevox.sh)
Docker Compose
TCP_PORT environment variable and the -p port mapping to match (e.g., -p 9090:9090).
The server prints a configuration summary at startup showing each variable, its current value, and whether it's using a custom value or the default:
How It Works
When your self-hosted server starts, it establishes a persistent WebSocket connection to the GameVox cloud (the "control channel"). This connection is used for:
- Account authentication: When a member connects, their identity is verified against their GameVox cloud account.
- Public IP discovery: The cloud tells your server its public IP address, which is needed for WebRTC voice connections.
- Auto-updates: The cloud notifies your server when a new binary version is available.
- Server listing: Your server appears in the GameVox app for members to find and join.
All voice, chat, and file traffic goes directly between clients and your server. The cloud is only used for authentication and coordination — it never sees your messages or voice streams.
Telemetry & Monitoring
Your self-hosted server sends a lightweight status heartbeat to the GameVox cloud every 30 seconds over the control channel. This data is used to power the owner dashboard, detect when updates should be delivered, and help diagnose issues. No message content, voice audio, file contents, or user activity is ever included.
What is sent
| Data | Purpose |
|---|---|
| Binary version | Determines whether an update is available |
| Connected users count | Owner dashboard & update scheduling (updates are deferred while users are in voice) |
| Video/screen share count | Owner dashboard |
| Uptime | Owner dashboard |
| Memory usage | Health monitoring |
| Goroutine count | Health monitoring |
| Database file sizes | Storage monitoring on owner dashboard |
| Total message & file count | Storage monitoring (counts only, no content) |
| Storage directory size | Disk usage monitoring |
| Backup status & timestamp | Alerts the owner if backups stop succeeding |
| Schema version | Ensures database migrations are applied correctly |
| Control channel reconnect count | Connection stability monitoring |
| Recent errors (type and context) | Helps diagnose issues without requiring operator intervention (e.g. database write failures, backup errors). Error messages are truncated and never contain user data. |
Database Architecture
Your server uses two SQLite databases, stored in the data/ folder next to the binary:
community.db
Structural data that defines your server's configuration:
- Channels and categories
- Groups and permissions
- Member list and roles
- Server settings
- Ban list
- Emoji metadata
content.db
Growing content data:
- Messages and edit history
- File attachment metadata
- Reactions
- Read state (which messages each user has read)
- Pins
- Announcements, polls, events
audit.db
Activity log data:
- Audit/activity log entries (who did what and when)
All databases use SQLite in WAL mode (Write-Ahead Logging) for better concurrent read/write performance. Schema migrations are embedded in the binary and run automatically when the server updates to a new version.
Automatic Updates
Your self-hosted server updates itself automatically. When a new version is available, the cloud sends a notification through the control channel with a download URL. The server then:
- Downloads the new binary to a temporary file next to the current one.
- Verifies the download (checks file size is reasonable).
- Notifies all connected clients that the server is restarting for an update.
- Replaces the running binary using a platform-specific safe replacement strategy.
- Restarts. On Linux, the process re-execs itself in-place. On Windows, it spawns a new process and exits.
If users are in a voice call when an update arrives, the update is deferred until all voice connections are closed. This prevents interrupting active conversations.
Update strategy by platform
- Linux: The current binary is renamed to
.old, the new binary takes its place, and the process callsexec()to replace itself in-place. The old binary is cleaned up on the next start. - Windows: Windows allows renaming a running executable. The current binary is renamed to
.old, the new one takes its place, a new process is started, and the old one exits. The.oldfile is cleaned up on the next start.
Restart=always policy ensures the server comes back up after updates. The binary replacement happens before the exit, so the restarted process will be the new version.
Backups & Restore
Automatic database backups
Both databases are backed up automatically every 3 hours using SQLite's VACUUM INTO, which creates a consistent snapshot even while the database is being written to. Each backup creates a timestamped directory inside data/backups/ containing everything for that point in time.
Each backup directory contains:
Tiered retention policy
Old backups are automatically cleaned up using a tiered retention schedule:
| Age | Retention |
|---|---|
| Last 7 days | Keep all backups (one every 3 hours) |
| 7 – 30 days | Keep 1 backup per day |
| 1 – 6 months | Keep 1 backup per week |
| 6 – 12 months | Keep 1 backup per month |
| Older than 12 months | Deleted |
Restoring from a backup
You can restore from any backup point directly from the server settings in the GameVox app:
- Open Server Settings and go to the Backups tab (owner only).
- Browse the list of available backup snapshots with their timestamps and sizes.
- Click Restore on the snapshot you want to revert to.
- Confirm the action in the warning dialog.
When you restore, the server automatically creates a pre-restore backup of the current databases before replacing them. This means you can always undo a restore by restoring from the pre-restore snapshot. After replacing the databases, the server restarts.
Manual backup trigger
You can also trigger an immediate backup from the Backups tab by clicking Backup Now. This creates a fresh snapshot of both databases without waiting for the next scheduled backup.
File Storage & Large File Backups
Uploaded files, custom emojis, and soundboard clips are stored on disk in subdirectories under data/:
data/files/— Chat file attachments and file share uploadsdata/emojis/— Custom server emojisdata/soundboard/— Soundboard audio clips
Files under 100 MB are automatically included in each backup snapshot as a zip archive. Files over 100 MB are backed up separately. You can also create a manual backup of all files from the GUI.
Automatic small file backups
Every backup snapshot automatically includes a files_backup_*.zip containing all uploaded files, emojis, and soundboard clips under 100 MB. This means each backup directory is a self-contained snapshot of your entire server.
Large file backups (automatic)
Files over 100 MB are automatically backed up individually as zip files in data/backups/large_files/. Each large file gets its own zip, created once and kept as a single copy. Since uploaded files are immutable (never modified after upload), the server only needs to zip each large file once. This runs automatically after each backup.
Manual file backup (from the GUI)
In the Backups tab, click Create File Backup to generate a .zip archive of all uploaded files (including large ones). The archive is saved to its own timestamped directory and can be downloaded from the browser.
File manifests
Each backup also generates a file manifest — a JSON file listing every uploaded file that existed at that point in time, including file IDs, paths, sizes, and whether each file is classified as "large" (100 MB+). Manifests are included in the backup directory alongside the database snapshots.
Data & File Locations
All data is stored in a data/ directory next to the server binary. The full directory structure:
data/ folder), and start it on the new machine. That's it.
What Data Is Stored Where
| Data | Stored On | Details |
|---|---|---|
| Channels, categories, permissions | Your server | community.db |
| Groups and roles | Your server | community.db |
| Server settings | Your server | community.db |
| Chat messages | Your server | content.db |
| Uploaded files | Your server | data/files/ |
| Custom emojis | Your server | data/emojis/ |
| Soundboard clips | Your server | data/soundboard/ |
| Activity log | Your server | audit.db (not backed up, safe to delete) |
| Announcements, events, polls | Your server | content.db |
| Badges | Your server | content.db |
| User accounts & authentication | Gamevox cloud | Login, registration, sessions |
| Subscription & billing | Gamevox cloud | Tier, payment status |
| Banner settings | Gamevox cloud | Server banner images |
| Access control rules | Gamevox cloud | Who can join the server |
Custom Storage Location
Want to store uploaded files or backups on a different drive? Use a start script to set environment variables before launching the server. Download a template and edit the paths:
Windows
Save this as start-gamevox.bat next to gamevox-self-hosted-server.exe and double-click it to start:
Linux / macOS
Save this as start-gamevox.sh, run chmod +x start-gamevox.sh, then ./start-gamevox.sh:
data/files/ or data/backups/ to the new location before restarting.
Troubleshooting
Can't connect to the server
- Make sure both ports (TCP 8088 and UDP 7070) are open in your firewall and forwarded through your router.
- Check that the server process is running and showing "Connecting to Gamevox cloud..." in the console output.
- If you're behind a carrier-grade NAT (CGNAT), port forwarding may not work. Contact your ISP or consider a VPN/tunnel solution.
Voice connects but no audio
- This is almost always a UDP port issue. Make sure UDP port 7070 is forwarded and not blocked by a firewall.
- Some corporate/school networks block UDP traffic. Try from a different network to confirm.
Server won't start
- Check that no other process is using port 8088. You can change the port with the
TCP_PORTenvironment variable. - On Linux, ensure the binary has execute permissions:
chmod +x gamevox-self-hosted-server - If you see "magic marker not found", the binary may have been corrupted during download. Re-download it from your server settings.
Update failed
- The server will log the specific error. Common causes: disk full, permission denied writing next to the binary.
- If an update is interrupted, the server will retry on the next check-in with the cloud.
- The old binary is preserved as
.oldnext to the main binary as a safety net.
Database is corrupted
- This is extremely rare with SQLite in WAL mode. If it happens, use the Backups tab to restore from the most recent backup.
- If the server can't start due to database corruption, you can manually copy a backup file from a snapshot directory (e.g.
data/backups/2026-03-15_140000/) over the live database file.
LAN & Event Use
GameVox self-hosted is a great fit for LAN parties, tournaments, and events. While the server and clients still need an internet connection for the GameVox API and authentication, all the bandwidth-heavy traffic — voice, video, and screen share — stays entirely on your local network. The built-in SFU (Selective Forwarding Unit) runs on the host machine, so media never leaves the LAN.
What stays on the LAN
On a LAN, WebRTC candidates resolve to local IP addresses directly. There are no STUN servers, no TURN relays, and no NAT traversal needed. Media packets travel the shortest possible path — from one machine on the switch to another. This means:
- Sub-millisecond voice latency — audio and video stay on the local network, never leaving your LAN.
- No bandwidth bottleneck — gigabit LAN speeds far exceed what voice and video require. Your internet connection isn't a factor for media quality.
- Full feature set — voice, video, screen share, chat, file sharing, soundboard, and everything else works.
What still needs internet
The server maintains a control channel connection to GameVox cloud, and clients authenticate through the GameVox API. This means your venue needs some form of internet access, but it can be minimal — even a basic mobile hotspot is enough, since only lightweight API calls go over the wire. All the heavy media traffic stays local.
Setting up for a LAN event
- Run the server on any machine connected to the LAN that also has internet access (even a basic connection is fine).
- Clients connect to the server's LAN IP (e.g.,
192.168.1.50). No port forwarding needed on a flat LAN — just make sure the host firewall allows TCP 8088 and UDP 7070. - Each client needs internet for login — they authenticate with GameVox cloud, then all voice/video/chat traffic goes directly to the LAN server.
Traffic breakdown
| Traffic | Path |
|---|---|
| Voice & video streams | LAN only (UDP to server) |
| Screen sharing | LAN only (UDP to server) |
| Chat messages | LAN only (WebSocket to server) |
| File uploads & downloads | LAN only (HTTP to server) |
| Soundboard, emojis, polls | LAN only (WebSocket to server) |
| User authentication | Internet (GameVox cloud) |
| Server control channel | Internet (GameVox cloud) |